

Putting It All Together in a Private AI Workflow
This is the finale. Across eleven parts you learned Harbor one piece at a time: projects, pushes, scans, gates, members, robots, retention, storage, and the way it talks to other registries. Now we step back and watch all of it serve one purpose. We will follow a single model image from the shelf in Harbor to a running endpoint on the Private AI platform, so the registry and the platform finally click together as two halves of one loop.
The whole loop in one picture
Before the steps, here is the shape of the thing. A model gets built or fine-tuned, pushed into Harbor, and later pulled by the platform when you deploy it. That is the entire lifecycle, and Harbor sits right in the middle of it.
Find a model on the shelf
Start where everything is stored. Open the model-store project and look at its repositories. This is the same project you toured back in Part 1, but now you are reading it as the source a deployment reaches into.
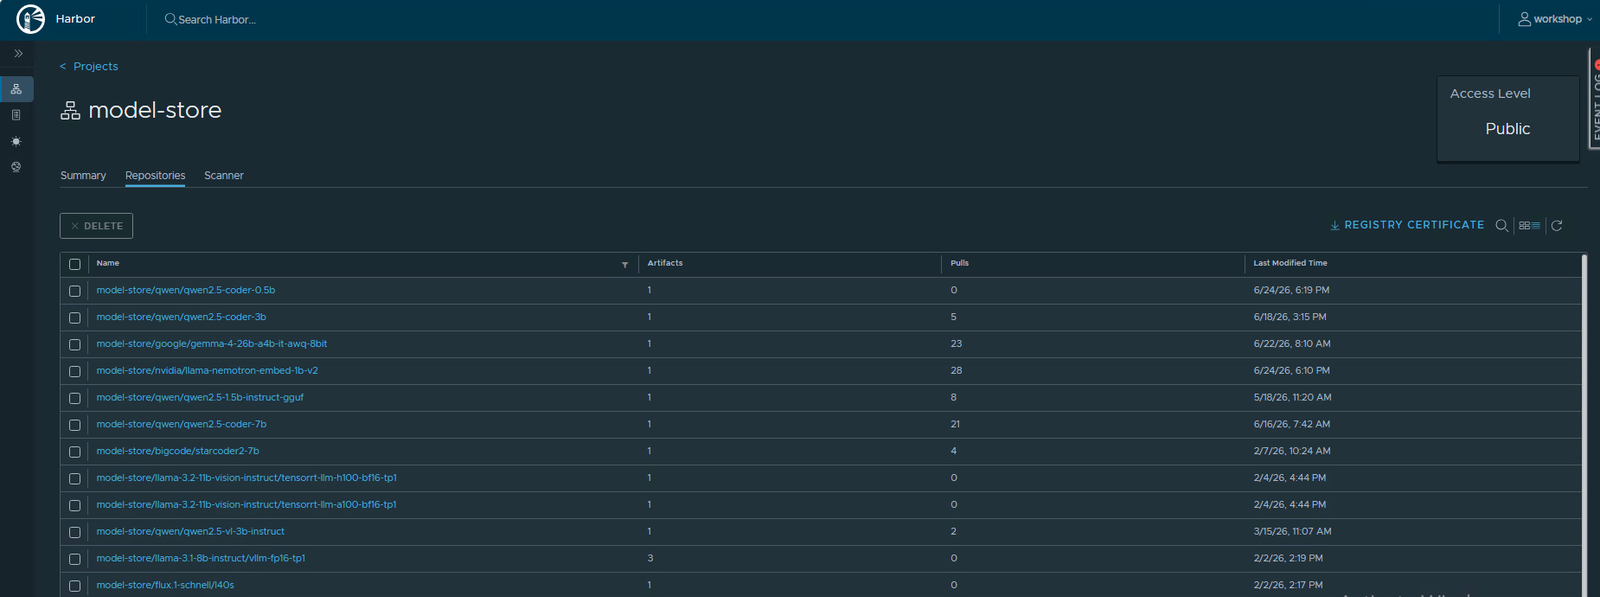
Pick one to follow. I used a small coding model, qwen/qwen2.5-coder-0.5b, because it is quick to look at. Any model in here works the same way.
Open the artifact and read its identity
Click into the repository, then into the artifact. You are back on the artifact view from Part 4, and the three things you learned to read there are exactly what a deployment cares about.
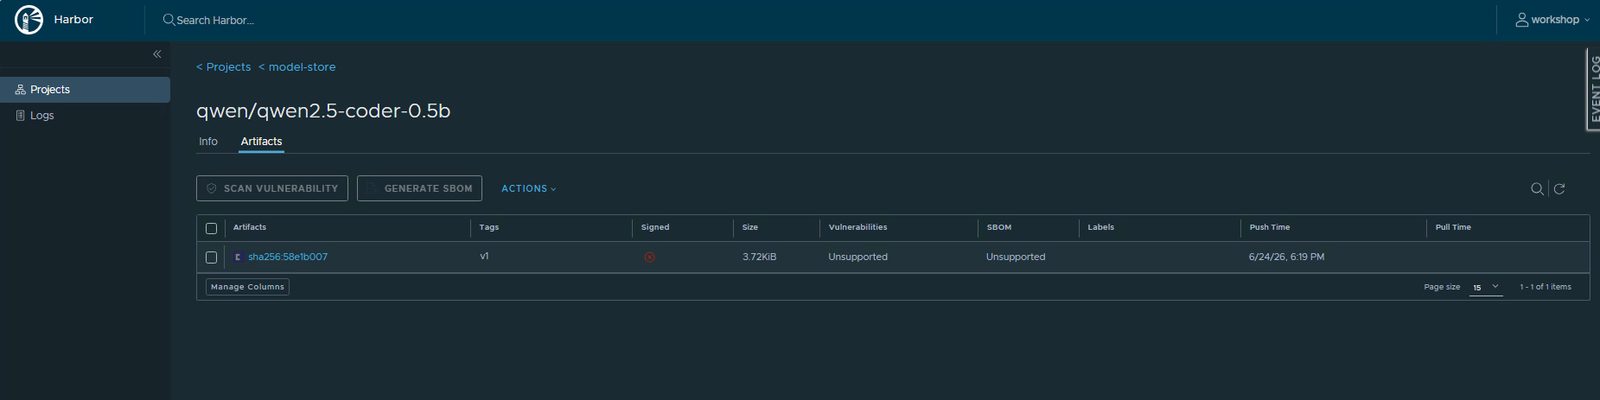
- The tag (
v1) is the friendly version name. - The digest (the
sha256string) is the true fingerprint. Tags can move, a digest never does. - The size tells you how much it weighs on the shelf.
Get the exact pull path
A deployment does not browse the console, it asks for an image by its full address. Harbor hands you that address. Open the Actions menu on the artifact and you will see Copy and Copy Digest.
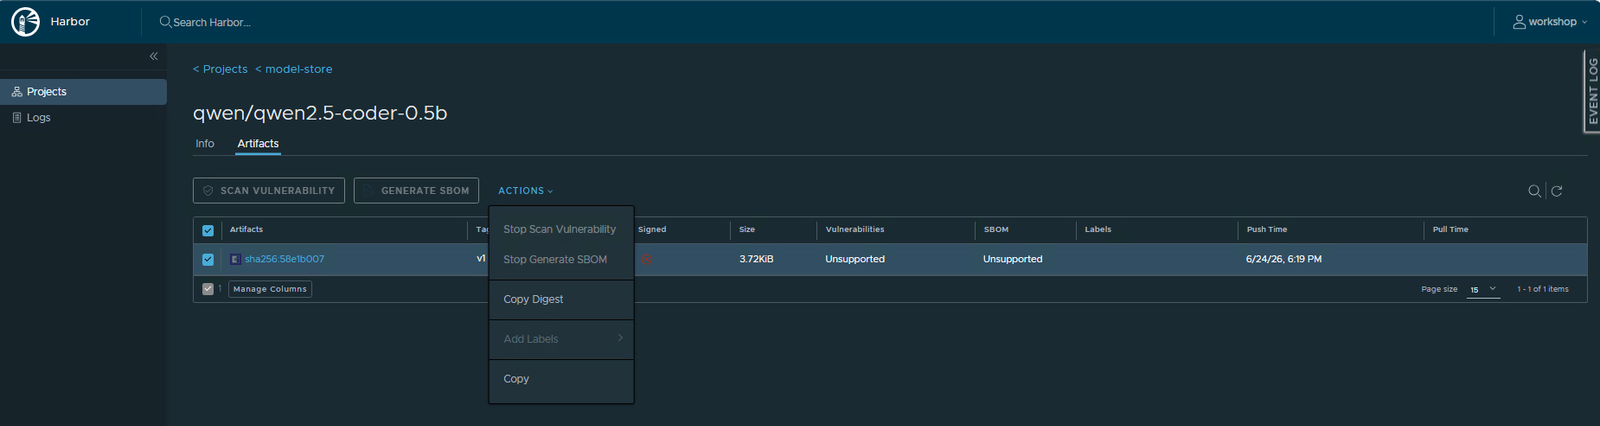
The address follows the same host/project/repository:tag shape from Part 3, with model-store in the project slot:
registry.lab.internal/model-store/qwen/qwen2.5-coder-0.5b:v1Or, pinned to the digest so it can never drift to a different build:
registry.lab.internal/model-store/qwen/qwen2.5-coder-0.5b@sha256:58e1b007...For anything headed to production, pin to the digest. A tag like v1 can be re-pushed to point at new bytes, but a digest always means the exact same image. The host is shown here as registry.lab.internal in place of the real lab host.
Deploy from that path
Now switch to the Private AI console and start a model deployment, the same screen you used in the earlier endpoint lab. The field that names the model source is where the loop closes: it is the very model-store/... path you just copied out of Harbor.
- Open the deploy or new model endpoint screen.
- Set the model source to the Harbor path from the step above.
- Deploy, and let the endpoint come up.
Behind the scenes the platform authenticates to Harbor, pulls the image, and starts serving it. If you open the Harbor Logs from Part 1 afterward, you can see the pull event land, your footprint from the platform side. That single pull is everything you built in this series doing its job: a scanned, governed, access-controlled image leaving the shelf to run.
The push side too
The loop runs both directions. When you fine-tune a model, the tuned result gets pushed back into Harbor as a new repository or a new tag, exactly the way you pushed your first image in Part 3. Once it lands on the shelf, it is deployable the same way, scanned the same way, and governed by the same rules. Push to Harbor, deploy from Harbor, repeat.
Where the eleven pieces fit
Look back and every part had a place in this one workflow. You made a project to hold images (Part 2), pushed one in (Part 3), learned to read its tags and digest (Part 4), scanned it (Part 5) and blocked the risky ones (Part 6). You handed out access with members and roles (Part 7) and robot accounts for the pipelines that push (Part 8). You kept the shelf tidy with retention and immutability (Part 9) and watched its storage (Part 10), and you saw how Harbor pulls from the wider world through replication and proxy cache (Part 11). All of it exists so that one deploy can pull a trustworthy image and run it.
That is the series
Twelve parts, from a first look at the console to a model serving traffic. If you worked through them in order, you can now use Harbor day to day in a Private AI estate with confidence. The full series, all twelve parts in one place, lives on the Harbor for Beginners complete guide.
Harbor for Beginners, Part 12 of 12. Product names belong to their owners. The host and any credentials shown are stand-ins.
About The Author







 DrJha
DrJha