

In Part 5 the scanner told you what was wrong with an image. By itself, that is just a label. Here we turn it into a rule: you pick a severity line, and Harbor refuses to hand over any image that crosses it. The risky image can sit in your project, but nobody can pull it. Let us set the rule, then watch it stop a genuinely vulnerable image.
Turn the rule on
To start, the rule is off, and the project will hand out anything you ask for.
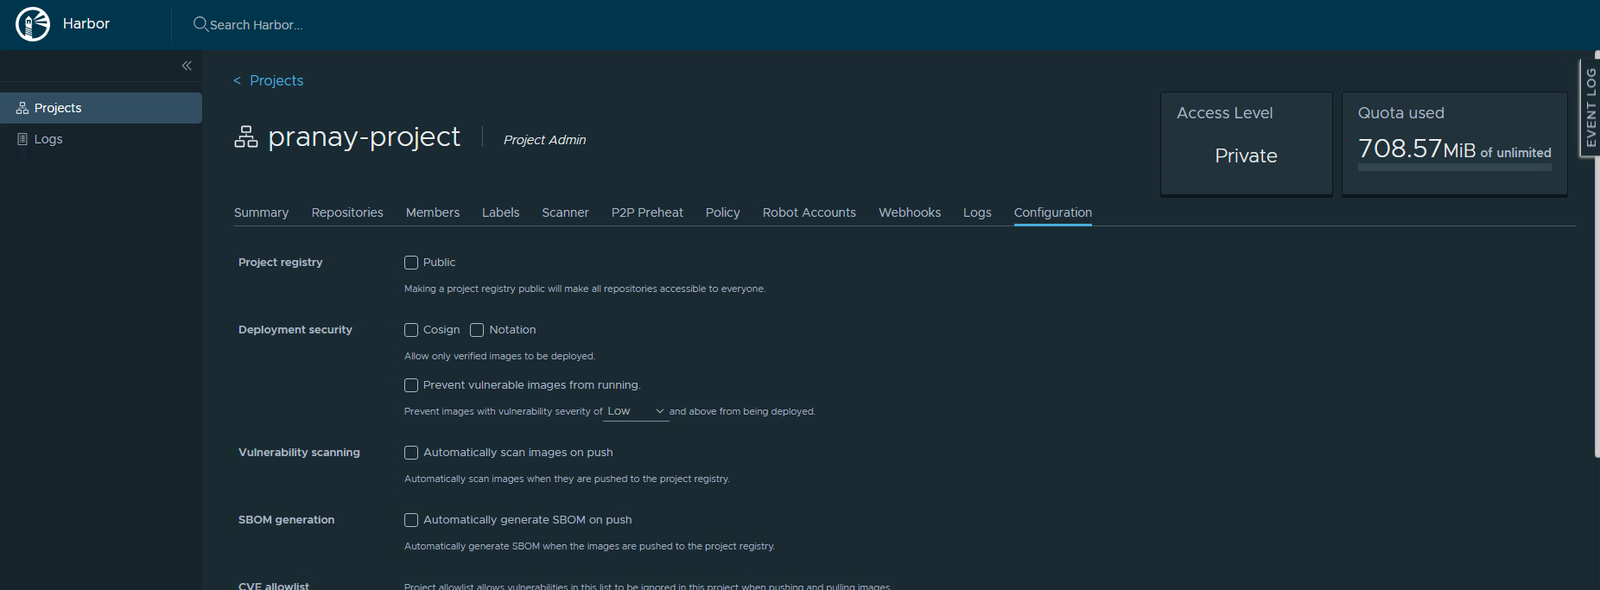
Now switch it on:
- Open your project and click the Configuration tab.
- Find the Deployment security section.
- Tick Prevent vulnerable images from running.
- In the dropdown, choose a severity. Pick High.
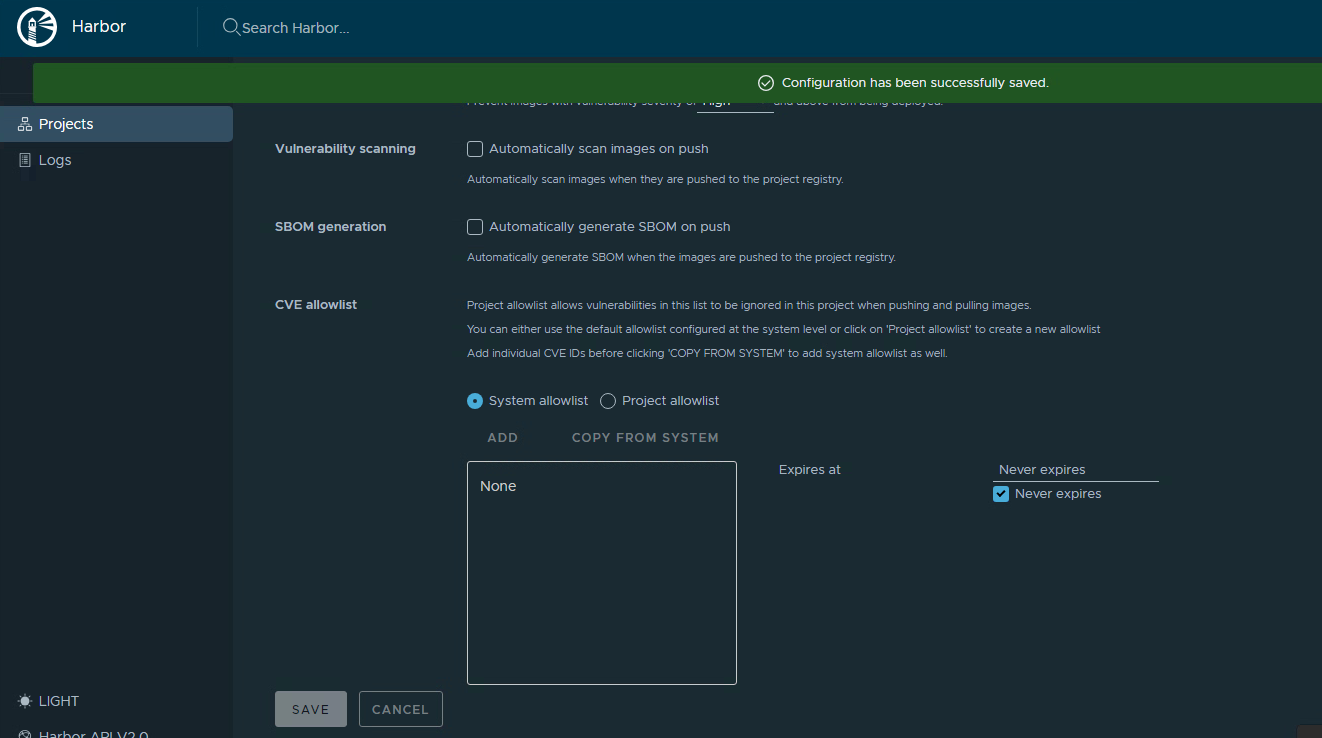
- Scroll down and click Save.
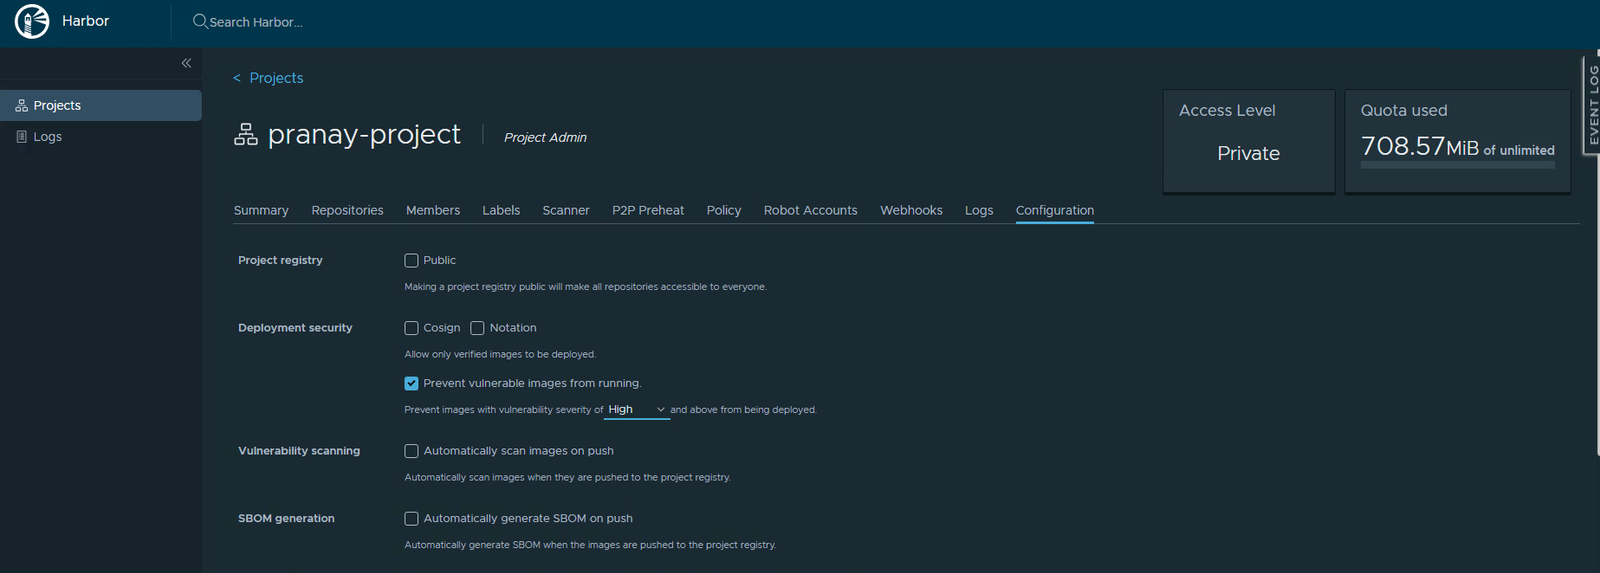
Harbor confirms the save, and the gate is live.
Add a vulnerable image to test
Your hello-world is clean, so the rule will never touch it. To watch the gate work, you need an image with real problems. An older nginx is perfect.
- Copy an older nginx into your project. Use your real registry host where the example shows
registry.lab.internal../crane copy nginx:1.21.0 registry.lab.internal/pranay-project/nginx:old --insecure - It now sits in your project, right next to hello-world.
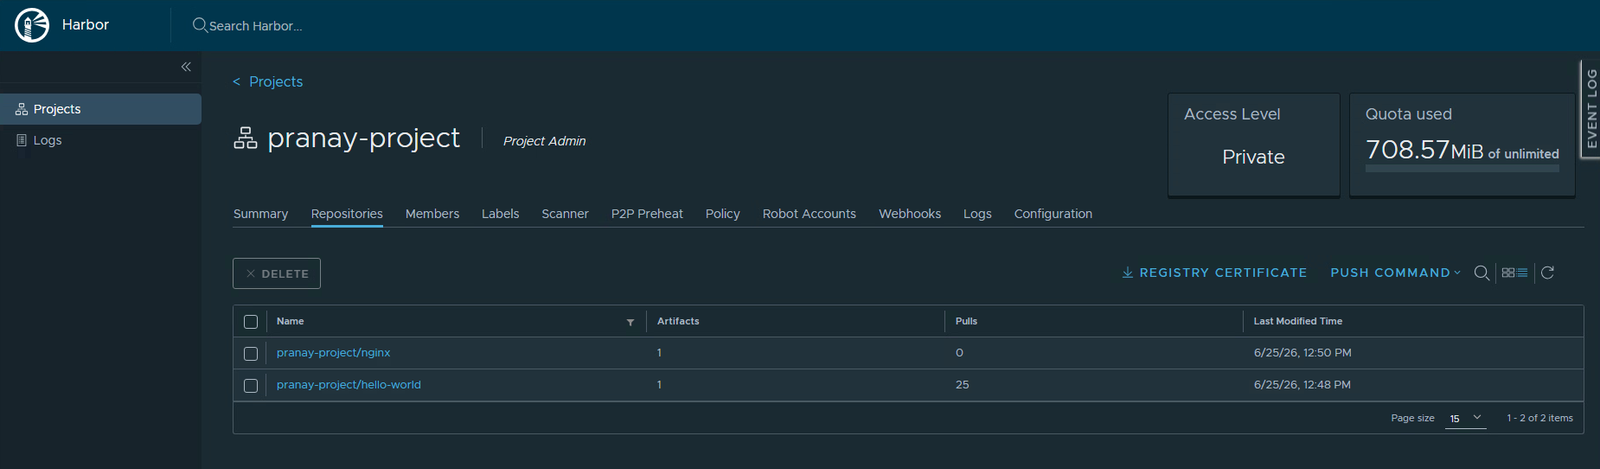
- Open the nginx repository, tick the artifact, and click Scan Vulnerability. At first it reads Not Scanned.
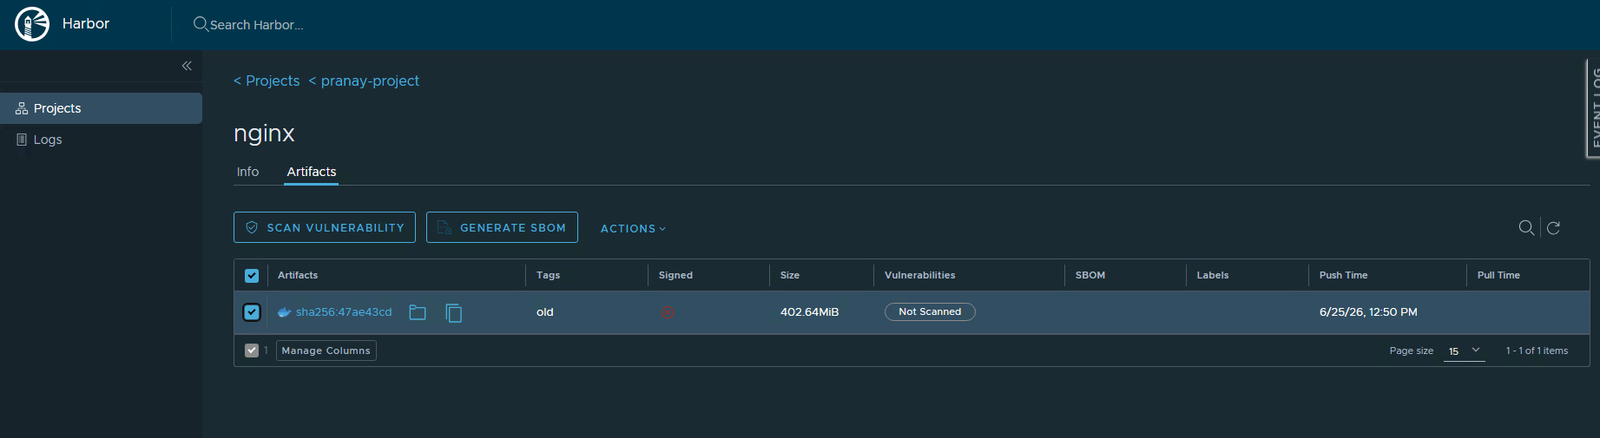
- Wait for the scan to finish.
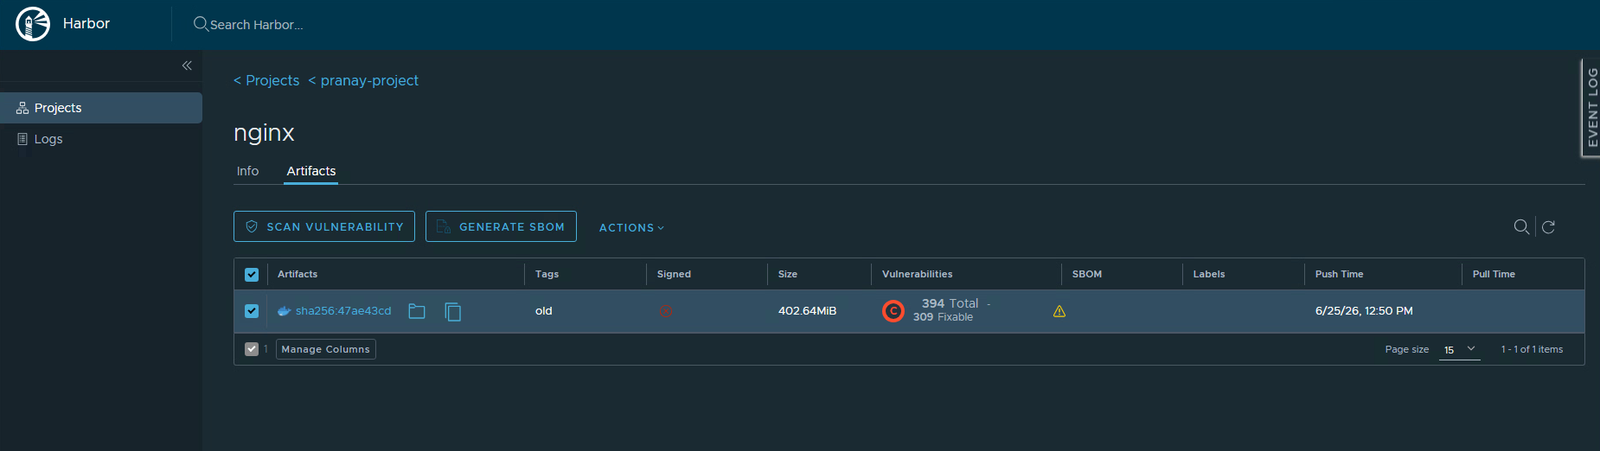
The result is striking. This older image carries 394 vulnerabilities, 309 of them with fixes already available, and plenty rated Critical.
Try to pull it
Now attempt to pull that nginx image:
./crane pull registry.lab.internal/pranay-project/nginx:old nginx.tar --insecureInstead of downloading, Harbor stops you cold:
Error: PROJECTPOLICYVIOLATION: current image cannot be pulled due to
configured policy in 'Prevent images with vulnerability severity of
"High" or higher from running.' To continue with pull, please contact
your project administrator for help.
That refusal is the whole point of this part. The image is sitting right there in the registry, but the policy will not let anyone pull it.
Check a clean image still works
The gate is precise, not a blanket lockdown. Pull your clean hello-world and it comes down with no fuss:
./crane pull registry.lab.internal/pranay-project/hello-world:v1 hw.tar --insecureNo error, no policy violation. The rule only blocks what actually crosses your severity line, and lets everything else through.
Allow one CVE if you must
Sometimes a single finding is a false alarm, or a risk you have looked at and accepted. You can forgive just that one without weakening the whole rule.
- On the Configuration tab, find the CVE allowlist.
- Click Add.
- Paste the specific CVE ID.
- Save.
Harbor now ignores that one CVE when it applies the gate. Everything else stays exactly as strict.
Treat the allowlist as a scalpel, not a switch. Forgiving one reviewed CVE is fine. Allowlisting things just to make a red badge disappear defeats the point of having a gate at all.
Quick recap
- The scanner finds problems. This rule acts on them.
- Set a severity line on the Configuration tab and save it.
- Images at or above that line cannot be pulled. Clean and lower-risk images are unaffected.
- Use the CVE allowlist to forgive a single reviewed finding without dropping the rule.
Next part
Part 7: people. We open the project to teammates and decide what each one can do, using the Members tab and Harbor’s roles.
Harbor for Beginners, Part 6 of 12. Product names belong to their owners. The host shown is a stand-in, not a real value.
About The Author







 DrJha
DrJha