

So far you have looked around and made yourself a project. Now comes the moment the whole registry idea finally clicks: you put an actual image into that project and watch it appear in the console. We will keep it simple, copy a tiny public image into your project, no building, no Dockerfiles, nothing heavy.
You do not need Docker
Most guides reach for Docker here, but you do not have to. We will use a small single-file tool called crane that copies an image straight from a public registry into yours, in one command, with no background service to install. And we will run it from the Jupyter notebook you already have open, so there is nothing to set up on your own machine.
Open a terminal
In JupyterLab, open the Launcher and click Terminal under the Other section. That gives you a plain command line that already lives inside the lab network, so it can reach Harbor without any extra plumbing.
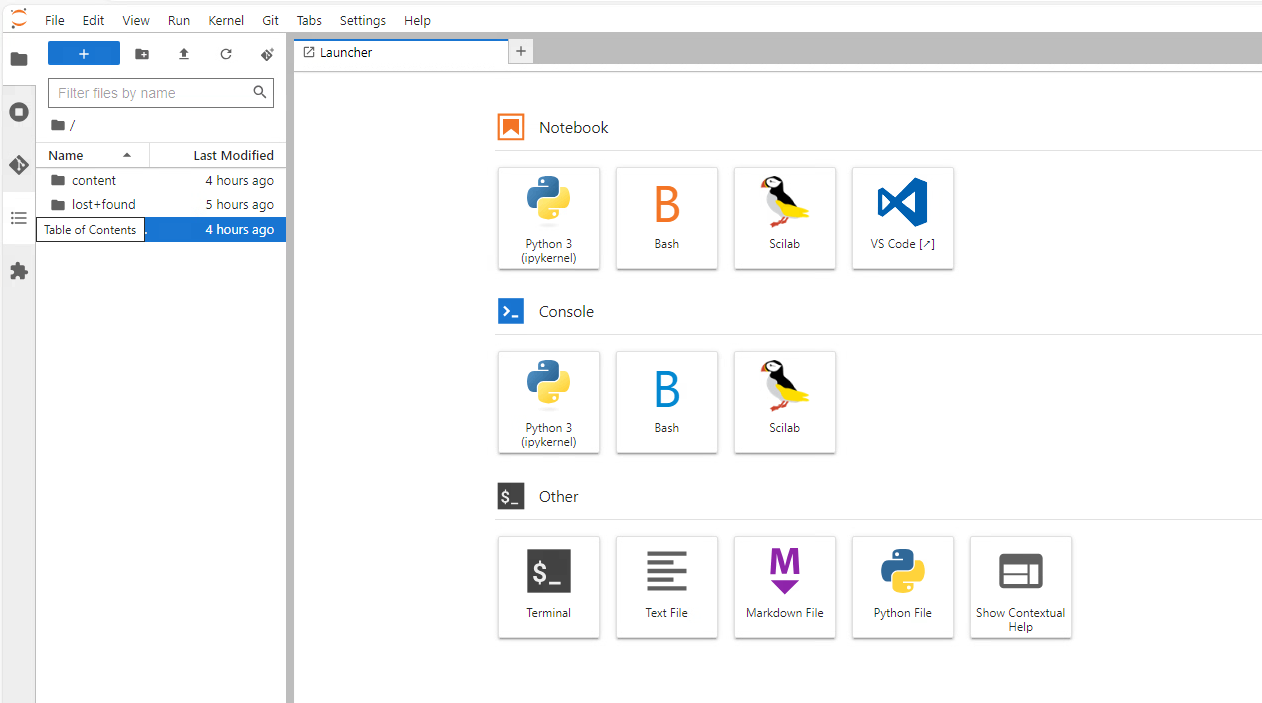
Get the crane tool
Download crane and check it runs. This pulls one small file into the current folder.
curl -sL https://github.com/google/go-containerregistry/releases/latest/download/go-containerregistry_Linux_x86_64.tar.gz | tar -xz crane
./crane version
If version prints a number, you are ready.
Log in to Harbor
Sign in with your Harbor username and password. The --insecure flag is there because the lab Harbor uses a self-signed certificate, the same thing your browser flagged as Not secure.
./crane auth login registry.lab.internal -u YOUR_USERNAME -p YOUR_PASSWORD --insecureA quick safety habit: try not to leave your real password sitting in your terminal history or in a screenshot. If you ever share your screen, blank it out. In this post the host is shown as registry.lab.internal and the password as ******** for exactly that reason.
Copy an image into your project
Now the main event. crane reads a tiny public image called hello-world and writes it into your project as hello-world:v1. One command does the pull and the push together, so there is no separate tag step.
./crane copy hello-world:latest registry.lab.internal/pranay-project/hello-world:v1 --insecureThe naming pattern is worth remembering: host/project/name:tag. That is how every image in a registry is addressed.
If you see a flurry of lines that say retrying without mount or unauthorized to access repository: library/hello-world, do not panic. That is crane trying a shortcut (reusing layers from a public library), failing because your account cannot read that other project, and quietly falling back to a normal upload. The copy still finishes. The proof is in the next step.
Check it in the console
Open your project in Harbor and go to the Repositories tab. The tab that was empty in Part 2 now has a hello-world repository. That alone tells you the push worked.

Click into the repository to see the image itself. You get the v1 tag, the size, a long sha256 digest, and a note that it has not been scanned yet.

What just happened
You moved a real image into a registry and saw it land. A few things on that artifact screen are worth a second look, because you will see them again and again:
- The tag (
v1) is the friendly name you gave this version. - The digest (the
sha256string) is the image’s true fingerprint. Tags can move, but a digest always points at the exact same bytes. - The size tells you how much space it takes.
- Not scanned is a reminder that nobody has checked it for security problems yet. We fix that later in the series.
That is the core loop of any registry: log in, push, and it shows up ready to pull. Everything else in Harbor is built around making that loop safe and organized.
Next part
Part 4: a closer look at what you just created. Repositories, artifacts, and tags, and how versions really work under the hood.
Harbor for Beginners, Part 3 of 12. Product names belong to their owners. The host and credentials shown are stand-ins, not real values.
About The Author








 DrJha
DrJha